
Identix K90 Pro is a very good device for Attendance recording. This device can be integrated with Cloud Servers, Similar to other ESSL biometric device k90 pro also connect to Crawlink School Erp System. Here in this post, I am giving information about network configuration of the device, ADMS configuration to connect the Crawlink server, create user, delete user, download Students/Staffs Crawlink Erp in Biometric compatible format, upload user data from USB Pendrive.
How to add Network configuration in the Identix K90 Pro device?
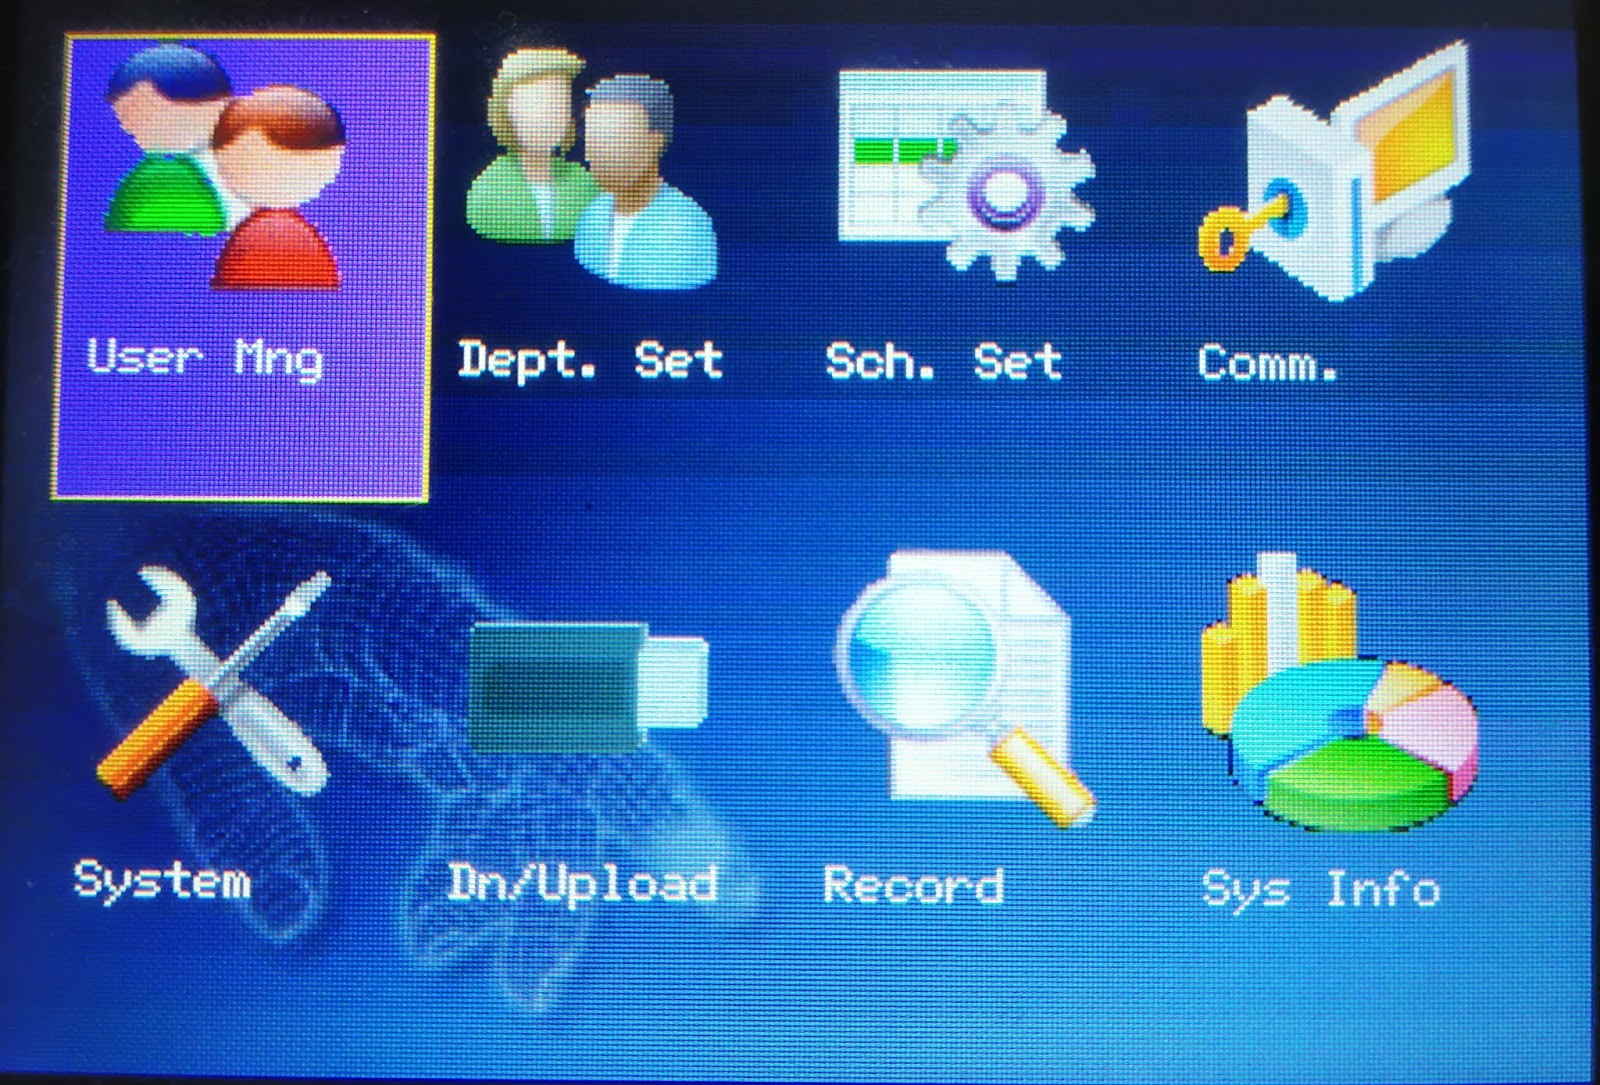
- Press M/OK button to enter into Main Menu.
- Select Comm. menu
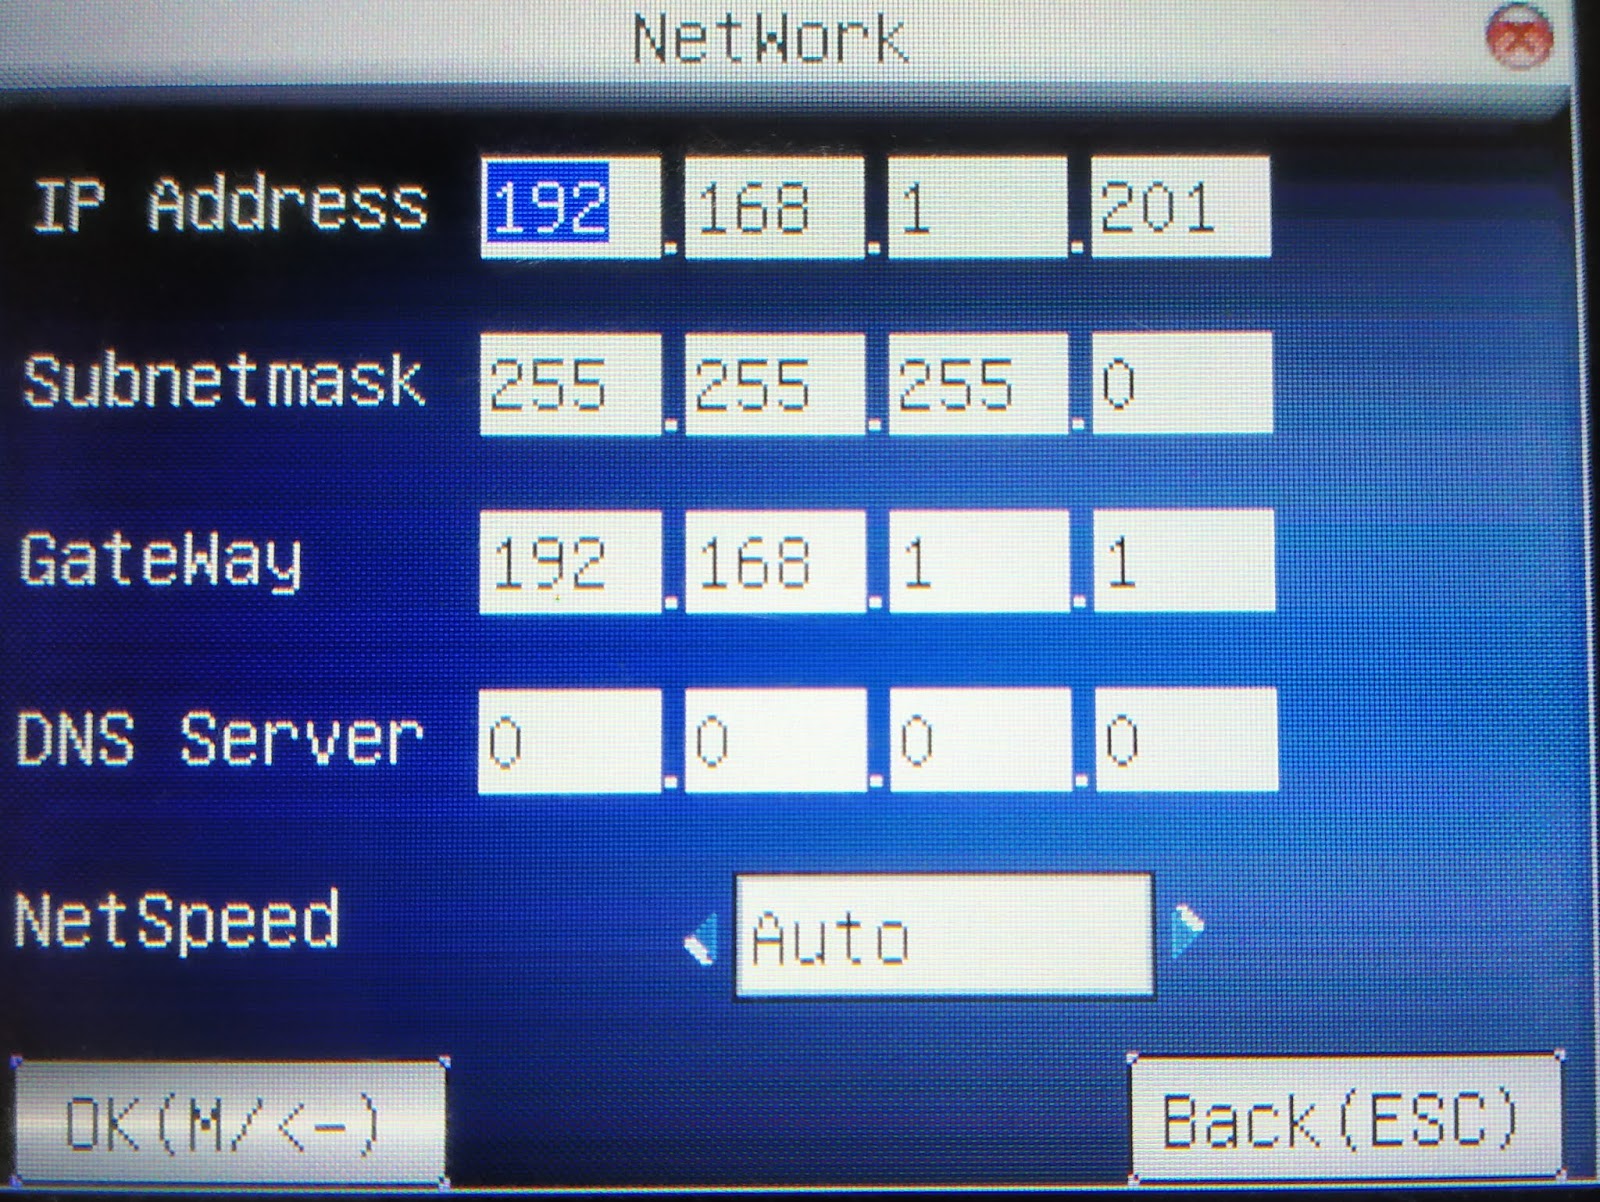
- Select Network Sub Menu
- IP Address: 192.168.1.201
- Subnet mask: 255.255.255.0
- Gateway: 192.168.1.1
- DNS server: 0.0.0.0
- Net Speed: Auto
- OK (Press M/OK Button)
- Done - (Now press ESC to come out)


ADMS Setup With Crawlink Server?
- Press M/OK button to enter into Main Menu.
- Select Comm. menu
- Select ADMS Setup Sub Menu
- ADMS Server: IP Mode, 13.233.181.137:8080
- Enabled Proxy Server: OFF
- Press OK (Press M/OK)
- Done - (Now press ESC to come out)


How to Download Employees/Students From Crawlink ERP?
1. Login to Crawlink Erp
2. Select Biometric Device in Left Navigation bar
3. Select Download User Data
4. Click on Filter option at the top - click on + button at the right-hand side
5. Click on the drop-down option - select User type (Left side)
6. Click on the drop-down and select Staff (Right side) for employees or
Click on the drop-down and select Student (Right side)
Click on the drop-down and select Student (Right side)
7. Click on Apply
8. Click on the Download button in the right top corner.
9. Select OK
10. It will Download user.dat file, put the user.dat file into Pen drive
How to Upload User data from Crawlink ERP to Biometric Device?
1. Connect pen drive in the biometric device (side wall there is a USB port for it)
2. Now Press M/OK in device
3. Select Dn/Upload in device
4. Select U Disk Upload in device
5. Select Upload User
6. Press OK (Press M/OK)
7. Done - (Now press ESC to come out)
8. Remove Pen drive from the device


How to create an Admin User in the device?
- Press M/OK button to enter into Main Menu.
- Select User Mng.
- Select New User, then Enter the user details
- ID = 1
- Name = Admin Staff Name
- (FP = Fingerprint) Select Enroll FP
- Highlight the finger in which the user wants to give fingerprint with arrow keys in the device - then the user has to give the finger impression three times (it will be displayed in the device). In case of the incorrect fingerprint, the user has to provide the impression once again
- Repeat step 7 for both the hands
- PWD = give 4 digit password
- Card = Touch the Admin RFID card, when the card touched the device the card Number will Enter into the device. (optional step and require if Proximity card access is required for the user)
- Select Purview or User Permission or User type (use arrow keys) - Admin
- Then press M/OK button on the device.
- Press ESC to come back.
How to provide Fingerprint and Card for users in the Biometric device?
1. Press M/OK button to enter into Main Menu.
2. Select User Mng.
3. Select Manage, then select the user from the list (use arrow keys to select)
4. (FP = Fingerprint) Select Enroll FP
5. Highlight the finger in which the user wants to give fingerprint with arrow keys in the device - then the user has to give the finger impression three times (it will be displayed in the device). In case of the incorrect fingerprint, the user has to provide the impression once again
6. Repeat step 5 for both the hands
7. Card = Touch the Admin RFID card, when the card touched the device the card Number will Enter into the device. (optional step and require if Proximity card access is required for the user)
8. Then press M/OK button on the device.
9. Press ESC to come back.
How to create an Admin User in the Biometric device?
1. Press M/OK button to enter into Main Menu.
2. Select User Mng.
3. Select New User, then Enter the user details
4. ID = 1
5. Name = Admin Staff Name
6. (FP = Finger print) Enroll FP
7. Highlight the finger in which the user wants to give fingerprint with arrow keys in the device - then the user has to give the finger impression three times (it will be displayed in the device). In case of incorrect fingerprint, the user has to provide the impression once again
8. Repeat step 7 for both the hands
9. PWD = give 4 digit password
10. Card = Touch the Admin RFID card, when the card touched the device the card Number will Enter into the device. (optional step required in case the user does access in Proximity or RFID card)
11. Select Purview or User Permission or User type (use arrow keys) - Select Admin
12. Then press M/OK button in the device.
13. Press ESC to come back.


Fingerprint Time Attendance Software offers a secure and accurate way to track employee attendance using biometric authentication. It eliminates buddy punching, enhances payroll accuracy, and streamlines workforce management. Ideal for businesses of all sizes, this system ensures efficient time tracking and improved accountability in daily operations.
ReplyDelete